Technology

Seismic Isolator Installation & Maintenance

Seismic Isolator Installation
Construction Requirements
  • The top surface levelness error of the piers (or columns) that support the seismic isolator shall not greater than 5‰; when the seismic isolator is mounted, the top surface levelness error of the seismic isolator shall not be greater than 8‰;
  • The deviation between the plane position and the designed position of seismic isolator center shall not be greater than 5 mm;
  • The deviation between the elevation and the designed elevation of seismic isolator shall not be greater than 5 mm;
  • The height differences of top surfaces among multiple seismic isolators on the same pier shall not be greater than 5 mm;
  • The concrete pouring of the lower pier must be compacted. In order to ensure the quality of construction, the construction party may conduct back-grouting or secondary pouring according to the construction difficulty and site conditions;
  • When installing the seismic isolator (when the bolt is finally screwed), the concrete strength of the lower pier shall not be less than 10 MPa and the maintenance period shall not be less than 5 days;
  • Anti-rust protection measures shall be taken between the connecting plate and exposed connecting bolts of seismic isolator;
  • During the seismic isolator installation, the pier top surface levelness, seismic isolator top surface levelness, the plane position and elevation of seismic isolator center shall be measured and recorded;
  • During the construction, temporary covering protection measures shall be taken for seismic isolation protection.
Installation Procedures
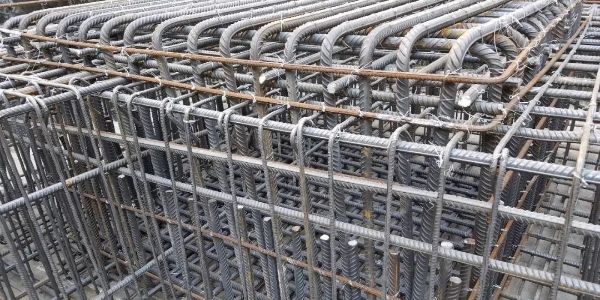
Lower pier steel bar binding
Step 1

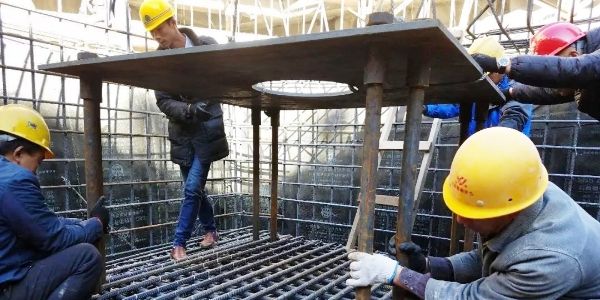
Bind the lower members of seismic isolator with steel bars and pour concrete to 20 mm below the lower pre-embedded plate. Pre-holes are reserved in the size of twice diameter of the anchoring steel rod.

Seismic isolator pre-embedded plate installation
Step 2

Calibrate the elevation and axial location of the lower pre-embedded plate. Bind the reinforcement mesh of lower member and place the lower pre-embeded plate into designed position. Level and fix the plate and erect formworks for secondary pouring preparation.
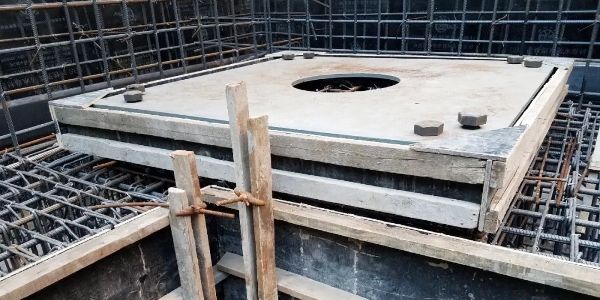
Seismic isolator lower member formwork installation
Step 3

Conduct secondary concrete pouring into the lower members, vibrate for compaction and dismantle the formwork.
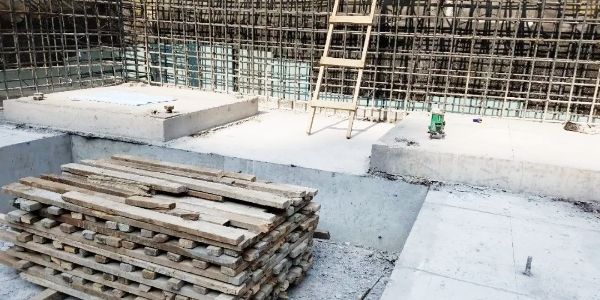
Lower member concrete pouring is finished and formwork is removed.
Step 4

Put the seismic isolator in place and fix it.
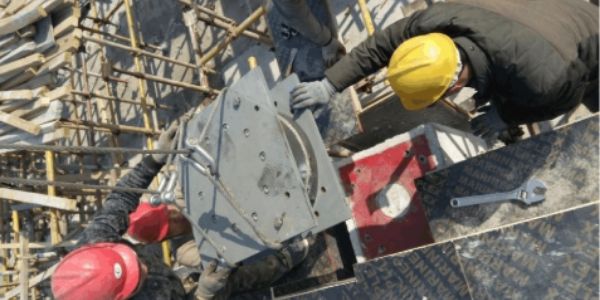
Install the upper pre-embedded plate of seismic isolator.
Step 5

Install the upper pre-embedded plate.
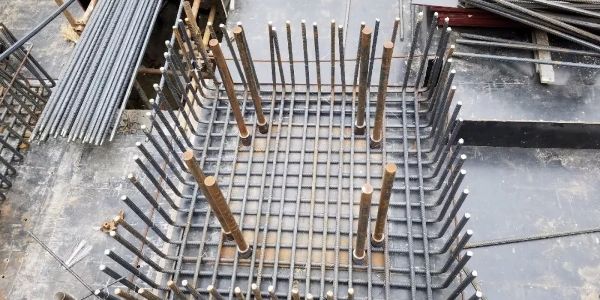
Bind the upper member of seismic isolator with steel bars.
Step 6

Bind the upper member of seismic isolator with steel bars and pour concrete.

Seismic Isolator Maintenance
  • Seismic isolator shall be inspected and maintained regularly at least once a year during use. If any problem is found, please notify the manufacturer promptly and conduct repair or replacement by professional technicians;
  • Loosen the bolt and check if it has been clipped. Clean and oil the bolt and then re-tighten it;
  • Check if the paint on the weld joint is off. If the answer is yes, repaint the weld joint;
  • Clean the debris and dust around the seismic bearing.
  • Check if there are obstacles that may restrict the displacement of the superstructure on a regular basis;
  • Observe the deformation and appearance of seismic isolator on a regular basis and check if the seismic bearing has been damaged or aged. If the answer is yes, replace the seismic bearing with a new one;
  • Measure the vertical deformation and horizontal deformation of the seismic isolator. If there is excessive deformation, it shall be corrected promptly to avoid the seismic isolator abnormality occurrence and threaten the safety of the structure.